Follow this simple setup guide to get your service fully automated with our bot
REQUIREMENTS
Before getting started with the bot please make sure you have the following setup.
GETTING STARTED
Bot Link
To access the bot click here https://t.me/AutoPaySolutions_Bot
Commands
The bot command to setup your service is hidden, this is so your customers don’t get confused and try to access this command.
After clicking “START” it will load up with a welcome message, this message is to assist your customers when they access the bot, you may ignore this message.
1. To begin setting up your service type the command “/register” (please see the attached screenshot)
If done successfully it will load a dashboard message with setup information and package information.
2. Click the button associated with the package you wish to use for example “Purchase New and Renew”
3. This will then open an invoice, please proceed to pay, once completed you will be redirected back to the bot with a message that says “Thanks for your payment. You can continue registration.” with a button below click continue registration.

LINKING YOUR SERVICE TO THE BOT
reCAPTCHA must be disabled
This is your service name. If the name of your service is “Example Service” please type here “Example Service”. The service name needs to be recognised so your customers can identify that it is your service they are connecting to.
This will be the link to your reseller panel for example
http://www.mywebsite.ddns.net:8080/123456
you do not need to type in anything after the numbers i.e. don’t type
http://www.mywebsite.ddns.net:8080/123456/login
Once you have added the URL it will then ask for a username and password. This is the username and password you use to login to your reseller panel.
If you get an error message on the bottom of your bot dashboard that says “your server information is invalid” after completing this step then you have entered one of the following incorrectly and you will need to amend them.
- URL
- Username
- Password
LINKING YOUR PAYPAL ACCOUNT
if you have selected the reminders only package you can ignore this step
This will only work if you have a PayPal business account. It will not work with a standard personal account.
Setting up your PayPal you will first be asked for your PayPal email address associated with your account and your Merchant ID.
You can get both by clicking here
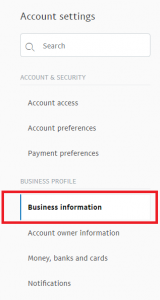 Click Account settings – business information and your Merchant ID will be displayed. Copy and Paste this in to the bot when instructed to after entering your PayPal email address.
Once Added it will then ask you for your API client ID and client secret. Please read the next TAB on how to get this information.
Once you have added your email and merchant ID to the bot it will ask you for your API Client ID and API Client Secret.
To get this information navigate to the PayPal website, once logged in you will see a “Developer” link at the top of the page. Click it.
The next step you need to make sure you select from “Sandbox” to “Live” then click “Apps & Credentials” (please see the image below)
![]()
Once you have clicked “Apps & Credentials” please make sure the “Sandbox” to “Live” is still selected to “Live” as sometimes it can automatically change back.
Next, under “REST API Apps” click the “Create App” button.
The NEXT page it will ask for an App Name, call it anything you wish as long as you remember what it is for i.e. Auto Payments.
The NEXT page it will display your Client ID and Secret (copy and paste these in to the bot when it asks for this information).
Once complete you will get a notification on the bot that will say “Added PayPal information successfully.”
If you get an error message then you have entered something incorrectly and you need to retry and follow the steps above making sure you are still set to LIVE and not Sandbox.
YOUR DASHBOARD AND SETTING UP YOUR SERVICE
Now you are registered with the bot you can now begin setting up your service for your customers.
In this section we will explain what each section does and how to use it. Please read this section very carefully.
Firstly, you will see on your dashboard something called “Service Code” Please make a note of this, this is very important as it is your unique ID that you must give to your customers in order for them to find your service on the bot.
This will be further explained under “Customers Guide” further down the page.
You will find this on your Dashboard and also when you click Manage Service. It will look something like this;
Service Code: 123456
Here you can select your preferred currency. At the moment we have 3 available options;
- GBP
- USD
- EUR
If you would like a different currency adding to the bot please contact us.
When you click this option you will see the following options available
- Change Service Name
If you need to change your service name you can do that here. - Edit Server Info
If you need to update your server URL, User and Password you can do this here. - Change Your Plan Type
If you decide you would like to upgrade/downgrade your plan type with the bot you can do this here. - Edit Packages
This is where you can activate and change your packages that are available to your customers. This is an advanced section so we have created a separate TAB explaining this further. Please see below. - User Options
Here is where you can give your users special permissions for their login information. Here you can select if you would like to give your users the option to change just their Username, Password, Both or None.
Please make sure your panel has granted the same permissions for the same options as the bot. - Set Character Length
Here you can set the minimum character length for both Username and Password. Please make sure this is set to the same minimum as set by the panel. - Confirmation Message
This is the message that is displayed to your customers after successful purchase of a package. For example;
Thank you for your purchase of our service. Here is the support group link if you need support with our service http://www.yourwebsite.com.
This is the option that allows you to be able to offer your customers the packages available to them. The bot will list all of the packages linked with your panel and here you can select which ones that will be enabled and disabled for your customers to view and order.
When you first click “Edit Packages” it will list all packages, and at the bottom of the message it will display “please enter package number to edit”
The package number is the number next to the package title. When you type in the number of the package you want to edit it will display the following options.
- Price
Here type the price of the package, you only need to type the number. You don’t need to enter the currency symbol. - Title (Panel)
If you want to display a different title of the package you can enter it here, most people choose to edit this if they believe that their customers might not fully understand what they are ordering. If you leave this blank it will display the default title of the package.
Changing the title only changes the title in the bot, it will not change the title on the panel.
- Title (Payment)
This will be the product title linked with PayPal. If you don’t want a product title you can leave this blank it will leave a blank title at the checkout. - Title (both)
As above but it will change the title to what you require but will do it simultaneously for both panel and payment titles or you can leave it blank. - Enable
Click this if you wish this to be enabled and visible to your customer - Disable
Click this if you wish to disable this package and remove it as an option for your customer.
Please see an example setup attached to the image.

Example
The package title on the panel is
1 Month with XXX – 1 Connection
The customer may get confused with this title so it has been renamed “Example Package” by selecting the Title (panel) option.
If you are selling a packet of pens and you want this to show up on your PayPal checkout you would change the Title (payment) to show this as indicated in the example i.e. “Pen Pack”
The price has been set using the price option and it has been enabled so it will now be visible as a purchase option when your client connects to the bot and views your products.
When your subscription with the bot is due for renewal please click the “Pay Service Fee” option to renew your service.
CUSTOMERS (END USERS) DASHBOARD
When your customer accesses the bot they will be given a list of commands to help them manage their package.
Commands Explained
- Help
This will display the main dashboard message - Purchase
This will allow them to purchase a new package - Renew
This will allow them to renew an existing plan - Add
If they have a package that has not been setup by the bot this gives them the ability to add it to the bot so they can manage/renew it in the future. - Manage
This gives your customer the ability to manage any of their packages that are registered on the bot.
When your customer purchases your package they will click or type /purchase and then they will be asked for your service code, if you are unsure what your service code is please click here for more info. (see example below)
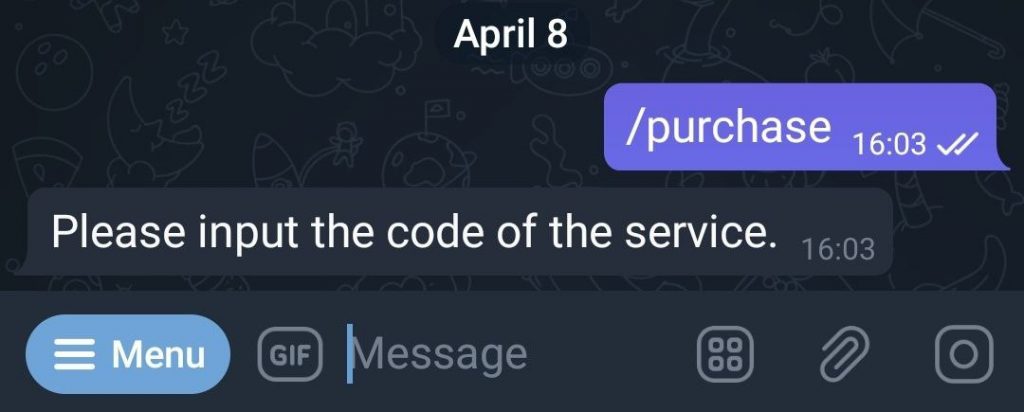
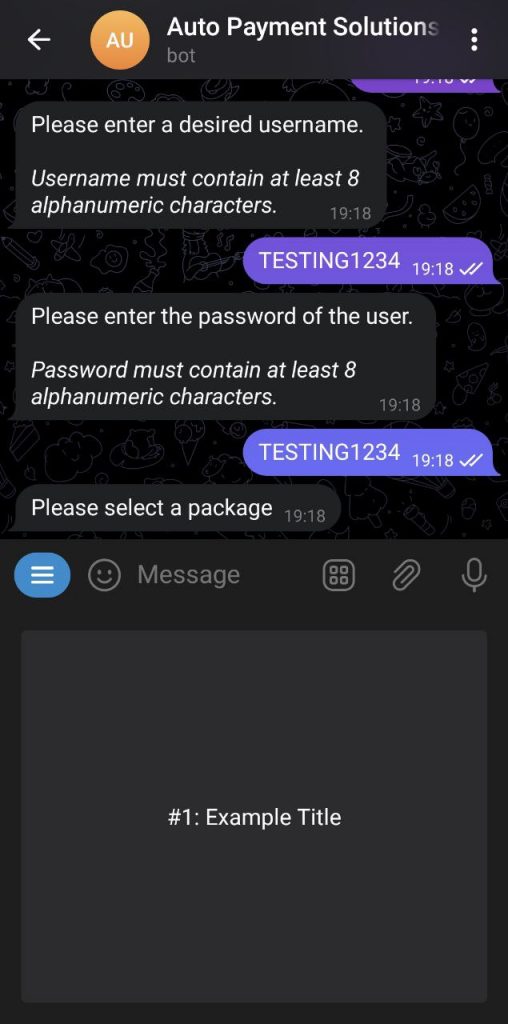
Once your customer has input your service code it will display your service title and they will be asked to confirm if this is correct.
Once your customer has confirmed the service is correct they will be asked to enter a desired username and password. When they have done that it will then list all the packages available for them to order. When they have selected their desired package they will then be directed to make the payment.
After successful payment the bot will instantly create the login and package and your customer will then receive your “confirmation message” that you have setup in your dashboard.

YOUR CUSTOMER NOW HAS AN ACTIVE PLAN ON YOUR SERVICE
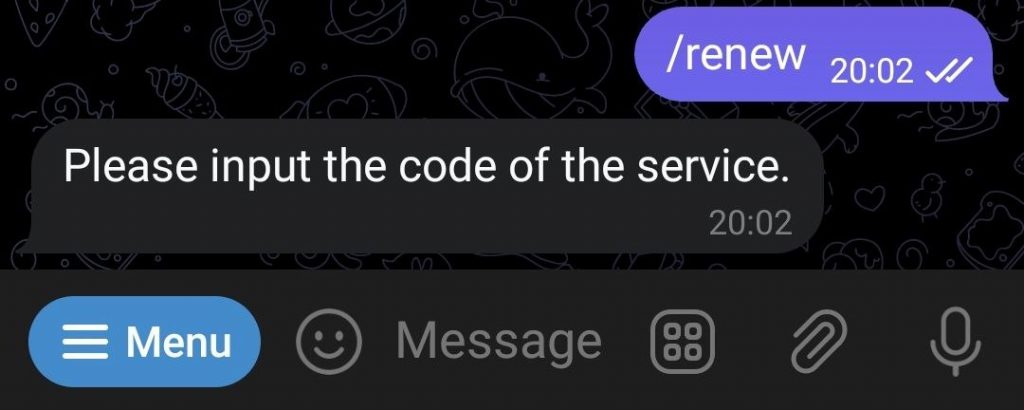
When your customer renews their package and it is their first time using the bot it is exactly the same process as purchasing a new subscription. However, the command will be different, the new command will be /renew. They will then be asked for your service code, if you are unsure what your service code is please click here for more info.
Once your customer has input your service code it will display your service title and they will be asked to confirm if this is correct.

Once your customer has confirmed the service is correct they will be asked to enter their existing username and password. When they have done that it will then list all the packages available for them to order. When they have selected their desired package they will then be directed to make the payment.

After successful payment the bot will instantly renew the login and package and your customer will then receive a message informing them their package has been renewed.
YOUR CUSTOMER NOW HAS RENEWED THEIR PLAN ON YOUR SERVICE
ADDING THEIR PLAN
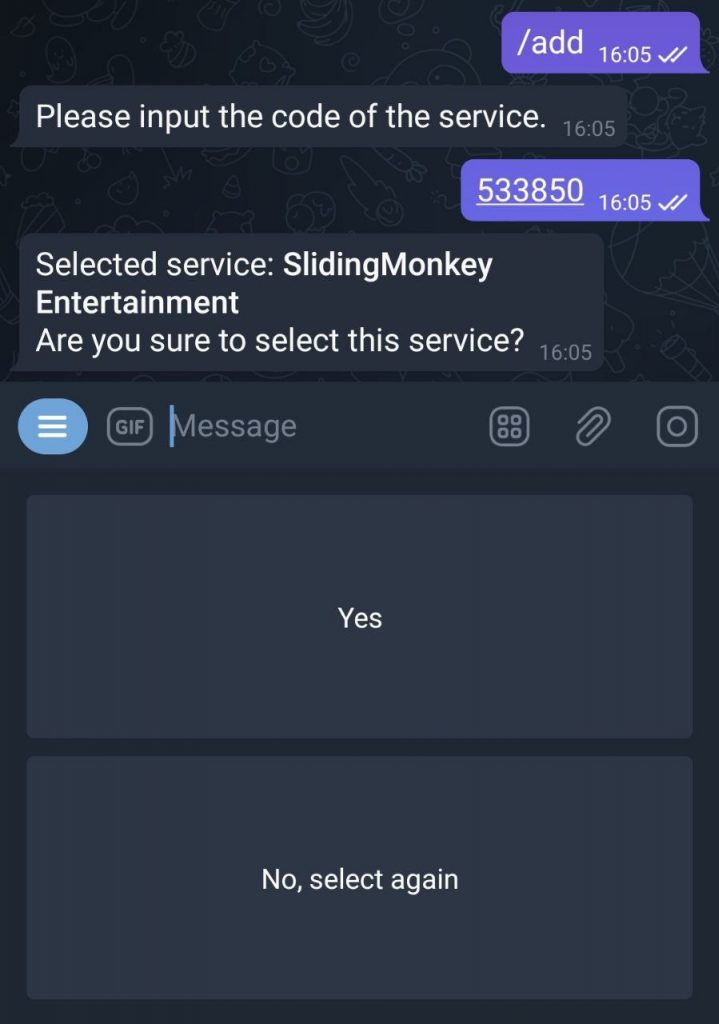
If your customers plan was generated without using the bot and they wish to add it, they can do so by using the command /add it will then ask them for your “service code” followed by their username and password. They will then receive a confirmation message that their plan was successfully added.


MANAGING THEIR PLAN
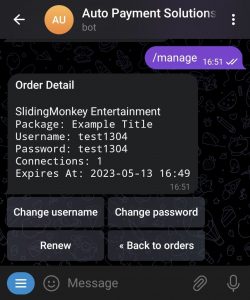
Your customers can manage their plans by using the /manage command. Here it will list all their plans that they have on the bot.
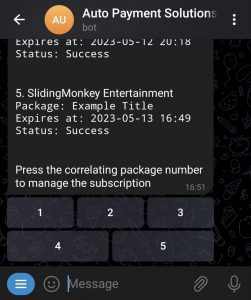
When they click the number of the correlating package they wish to manage, it will list the available options for that plan including renew, change username and password.
Your users will also be available to view their login details and expiry date.
These options will only be available if you have the correct plan setup and have enabled these features for your customers. For users that have only selected the reminders package your customers will only be able to view their login information and expiry date.